

How to Register to SAM.gov
How To Register My Company in SAM.gov
The first step of contracting with the federal government is to set up your company in SAM.gov. This will be a guide to registering your business entity as an active entity in SAM.gov.
Before You Start
Please have the following information available regarding the company/entity you are registering:
- Date of Incorporation
- For non-U.S. companies, any local identification numbers such as a taxpayer registration number or other official identification number.
- Fiscal year end date – most companies use December 31st (i.e. 12/31), but some use the end date of another month.
- Exact Legal Name and Physical Address of the company/entity
- For U.S. companies/taxpayers only, their U.S. TIN/EIN
Step-by-Step Registration
Step 1: Create Your Login.gov Account
If you have already done this, skip to step 14. Make sure that no-reply@login.gov is on your “safe senders” list in your email.
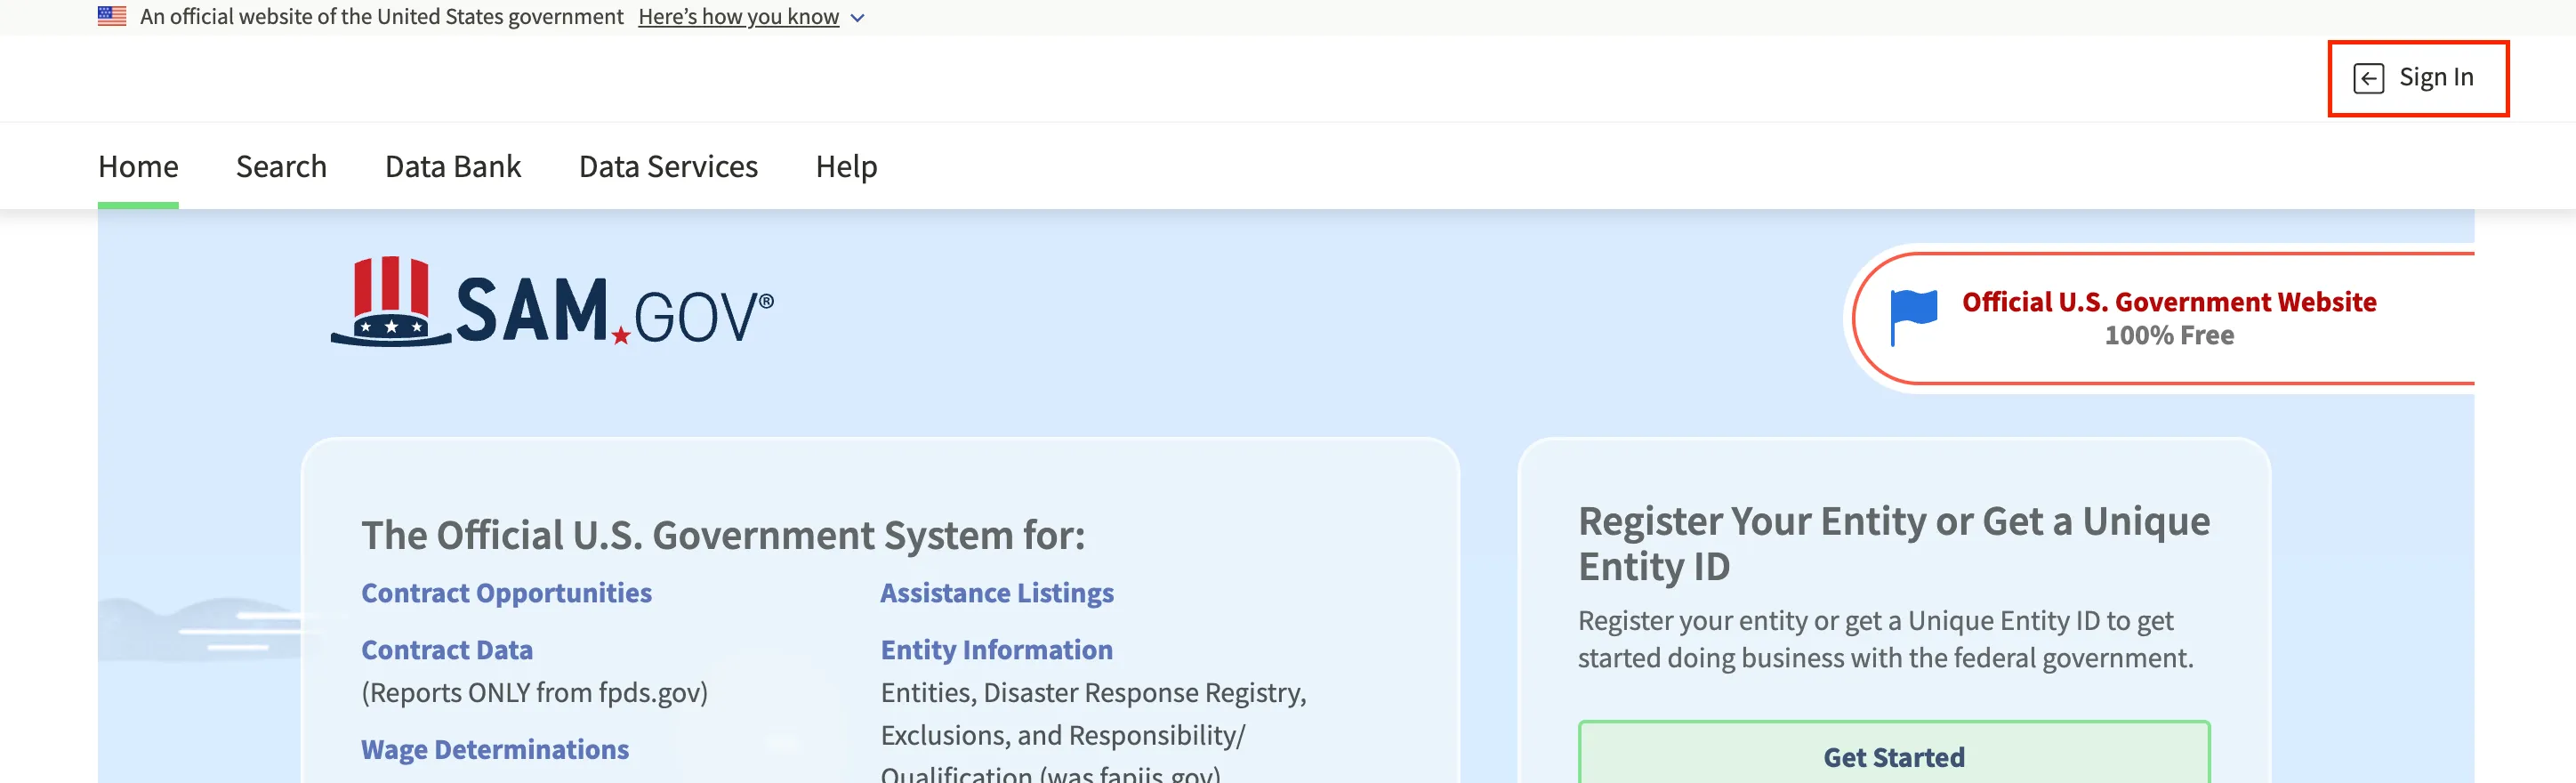
Step 2: Sign In to SAM.gov
Go to SAM.gov in your browser. Click Sign In in the upper right.
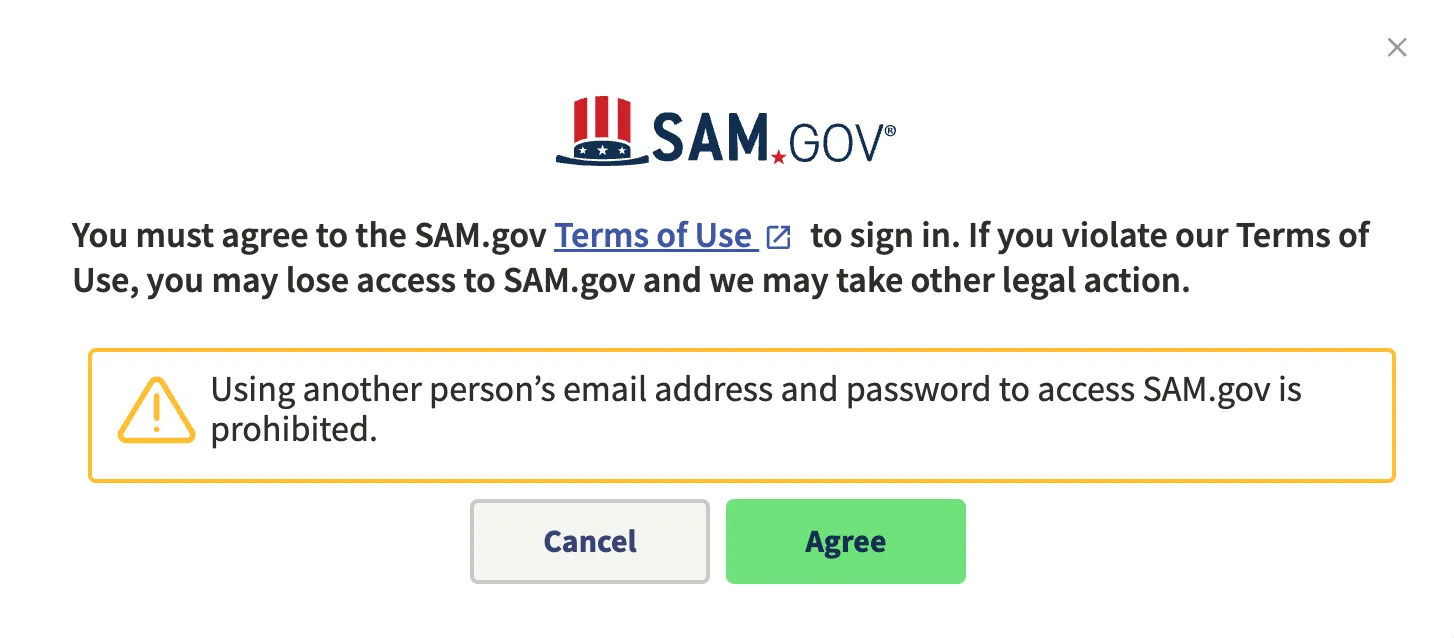
Step 3: Accept the Terms
Click Accept / Agree on the pop-up.
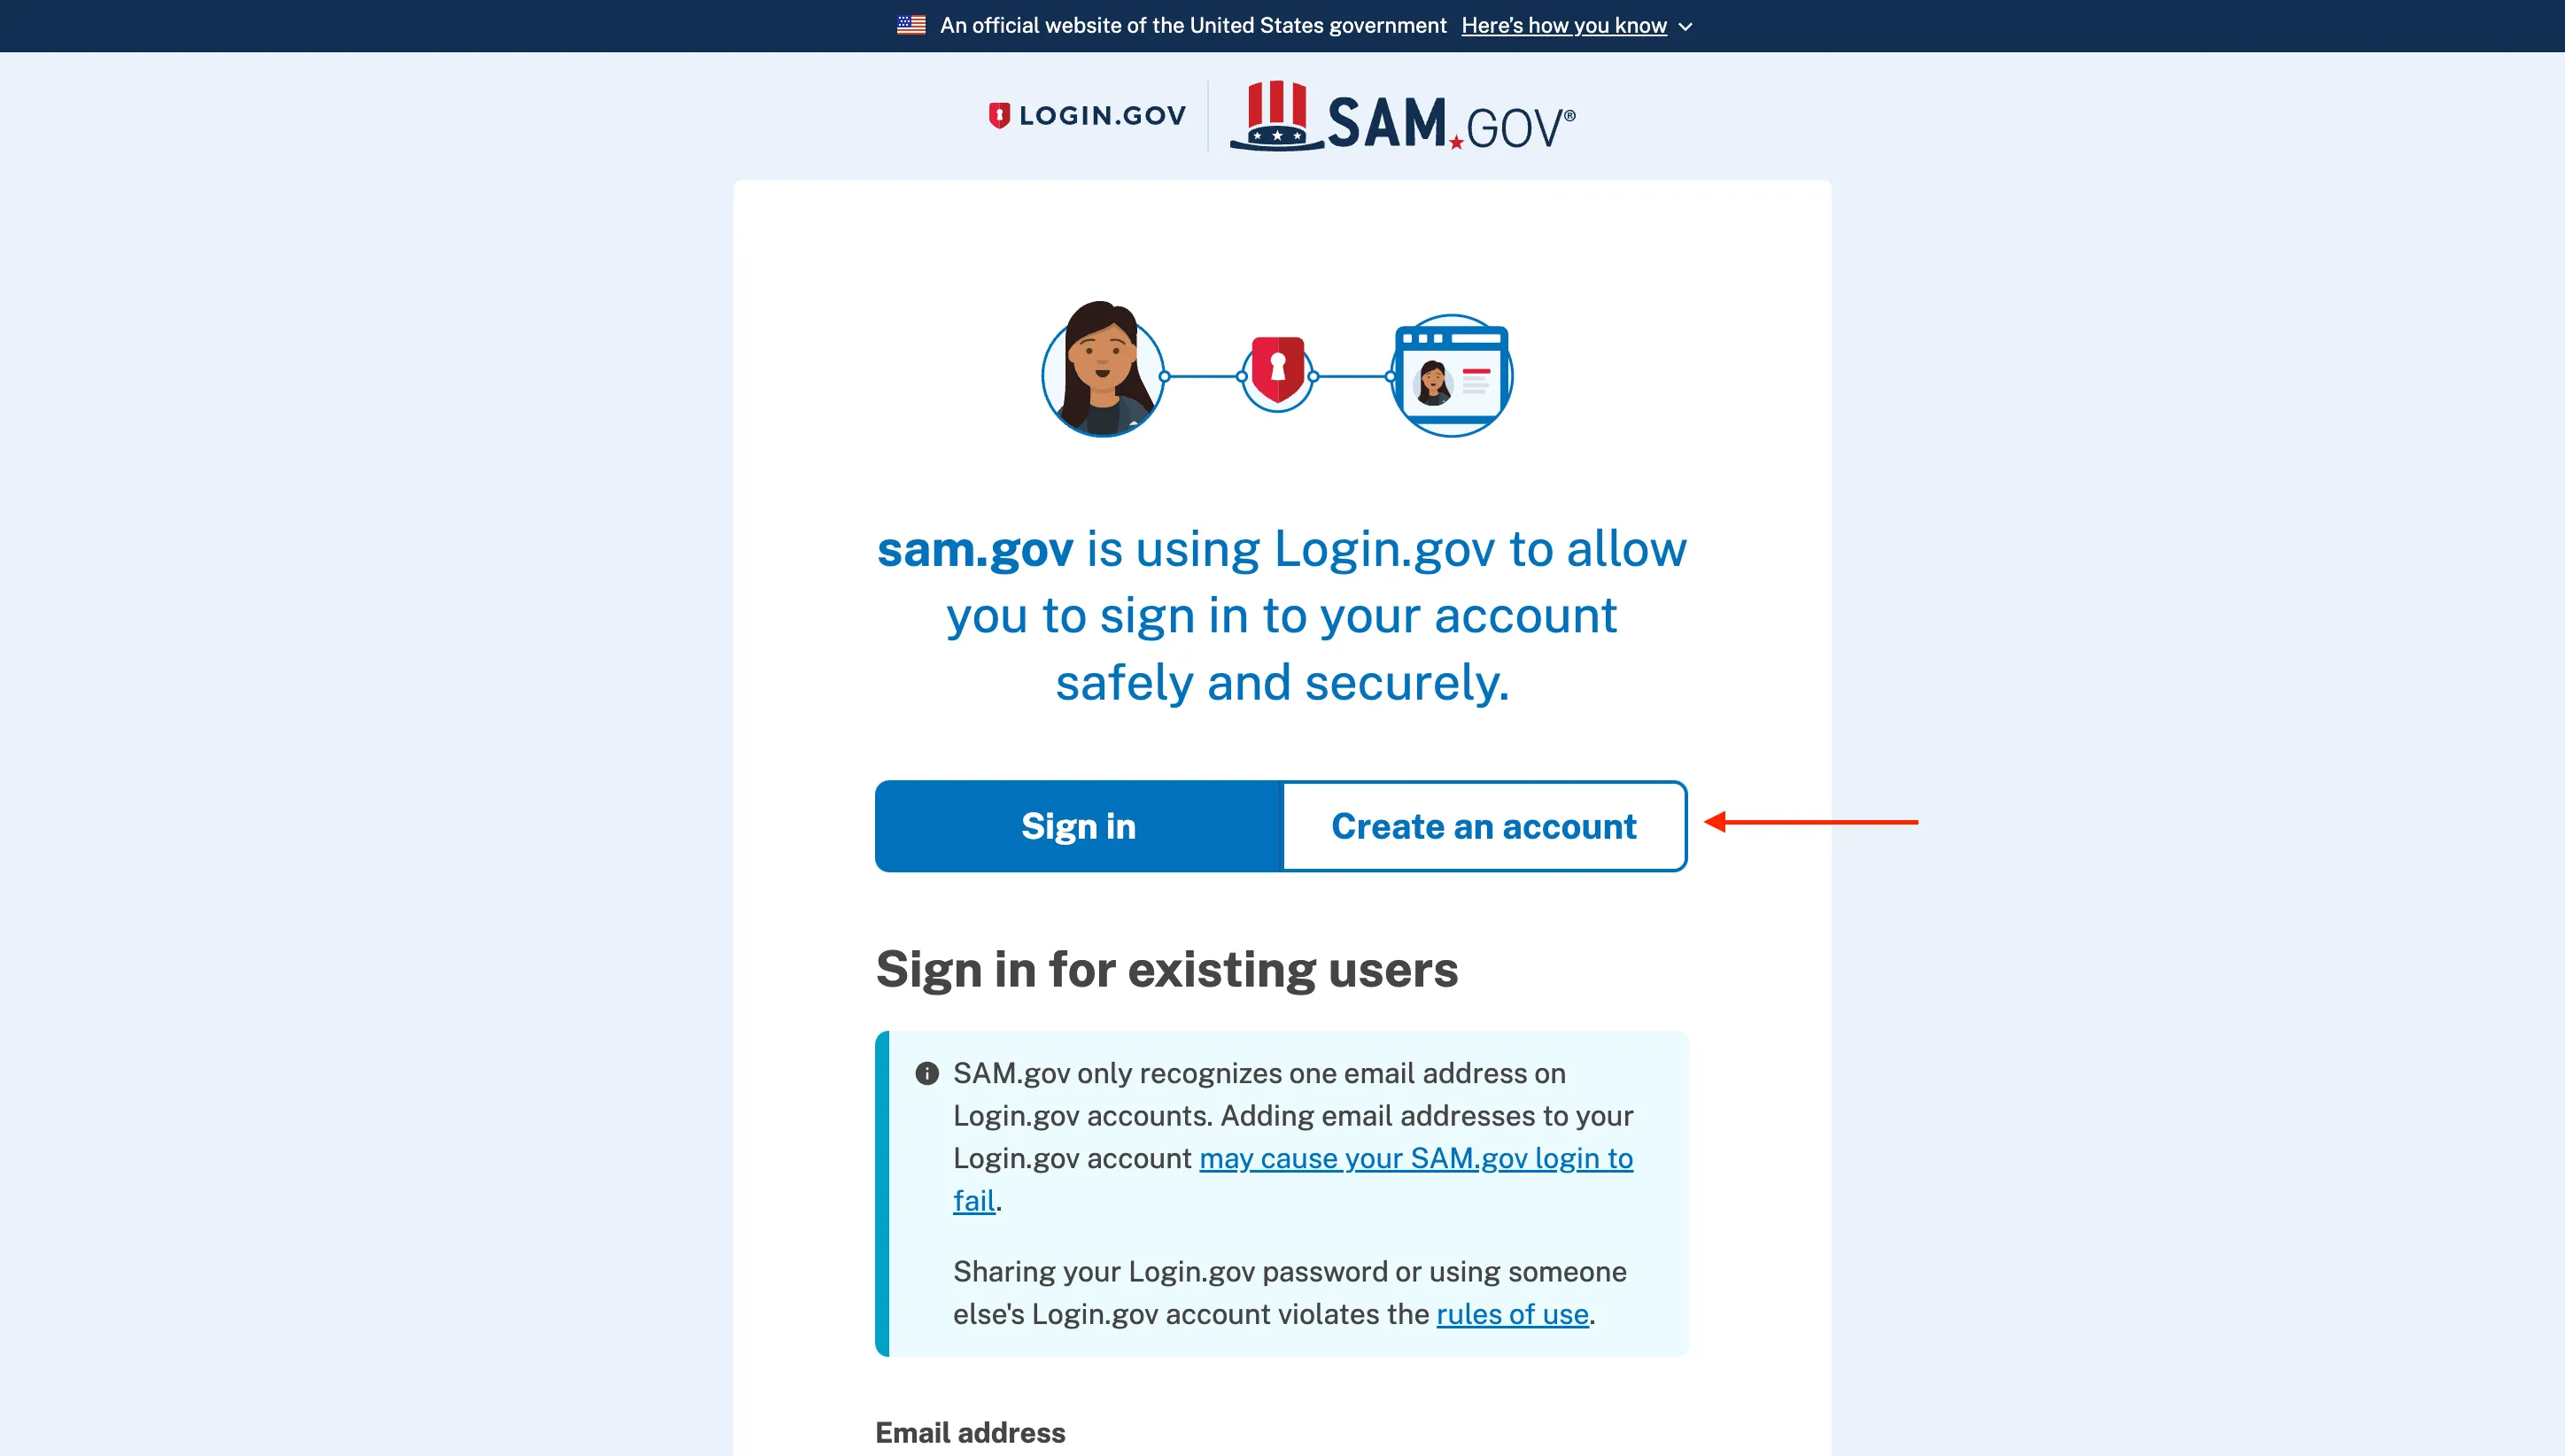
Step 4: Create an Account
Click the Create an account button.
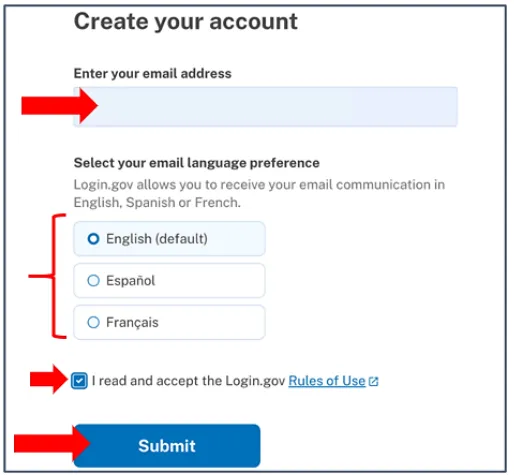
Step 5: Enter Email and Accept Terms
Enter your email address, choose your language preference, click the checkbox to accept the “Rules of Use,” and then click Submit.
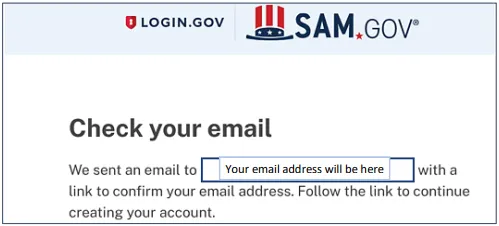
Step 6: Confirm Email
Login.gov will let you know that it has sent a confirmation email to the address that you provided in Step 5. The email will have a button that says Confirm email address or a link to paste into your web browser.
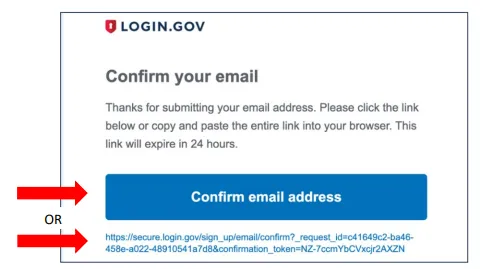
The email you receive will look like this. Either click the button that says “Confirm email address” or copy the entire “https…” link shown below it and paste it into your web browser.
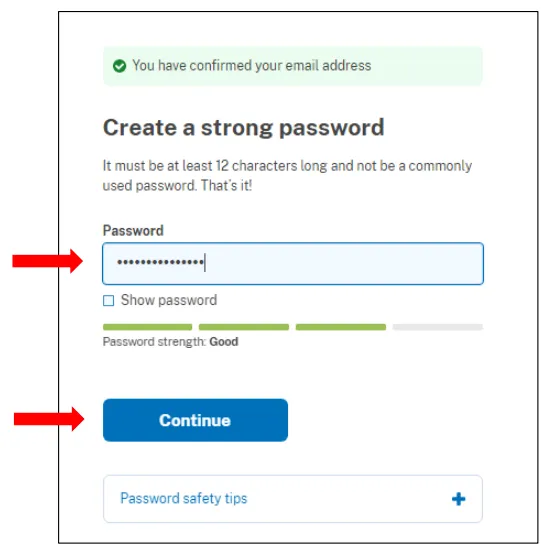
Step 7: Choose Password
Choose your password (make sure to write it down!) and click Continue.
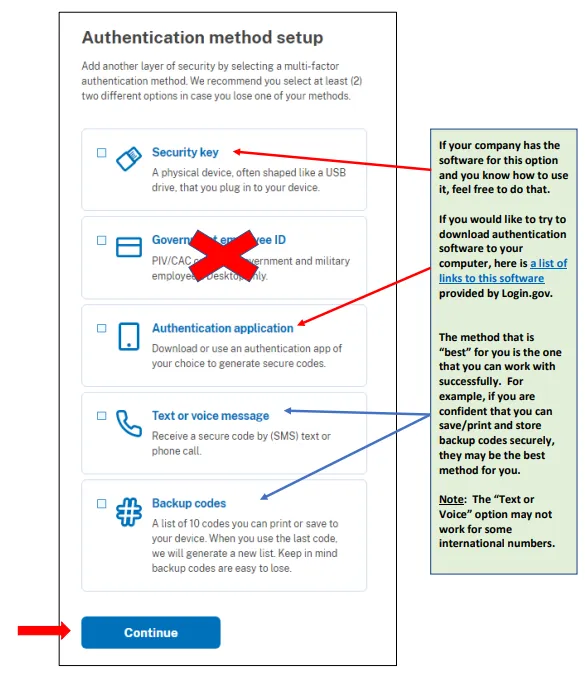
Step 8: Set Up Two-Factor Authentication
Login.gov requires that you choose a second type of authentication that will be used each time you log in. We recommend Text or Voice Message (although it may not work for some international numbers). If that is the case, use the backup codes (be sure to save them!). When you decide which option you would like to use, click Continue.
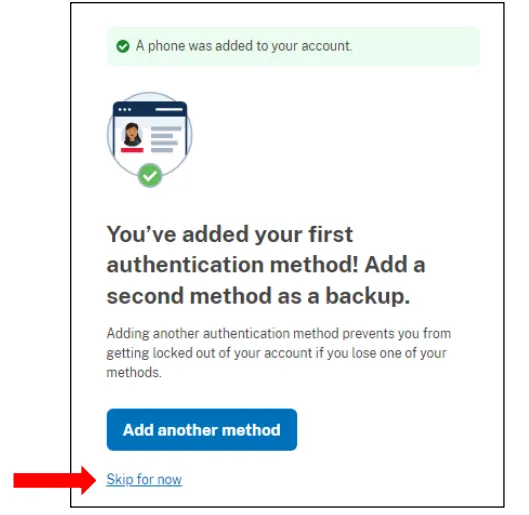
Step 9: Confirm Authentication
Once you have used the second authentication method to authenticate your account, Login.gov will confirm that your account has been created. It will ask if you would like to add a backup method. You can click Skip for now.
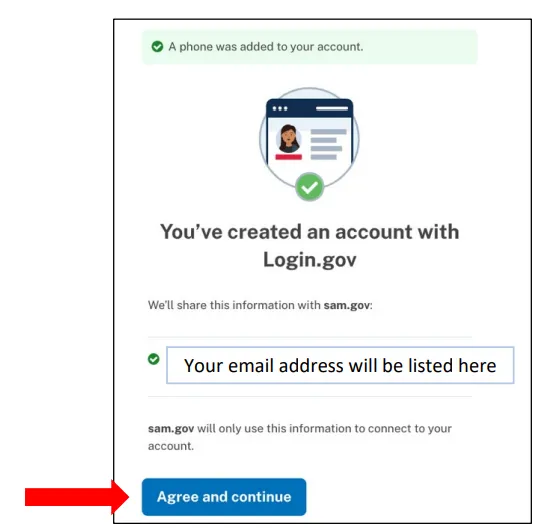
Step 10: Agree and Continue
You have created your Login.gov account. Click Agree and Continue, and the system will take you back to SAM.gov.
Step 11: Complete Your Profile
The system will take you back to SAM.gov to complete your profile. Check the box to agree to the User Access Terms. Click Next.

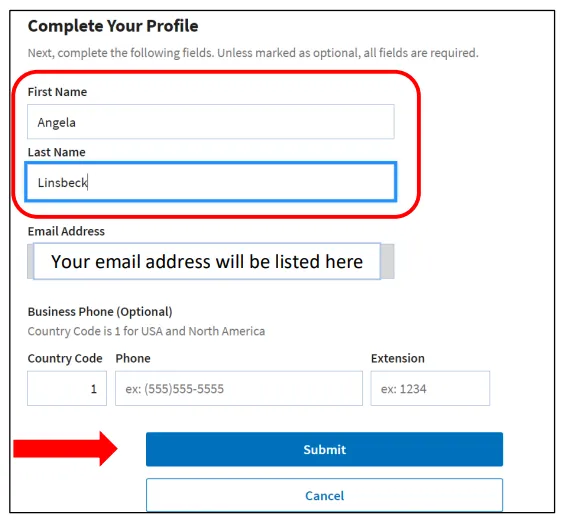
Step 12: Add Personal Information
Add your First Name and Last Name. Adding your business phone is optional. Click Submit.
Step 13: Finish Login.gov Account Creation
Scroll to the bottom and click Skip and Finish. This will take you to your SAM.gov workspace where you can start working on your registration.

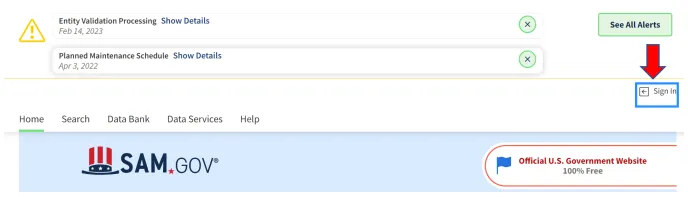
Step 14: Entity Administrator Sign In
The person who is going to be your Entity Administrator should go to SAM Entity Registration. Click Sign In and then log in using your email address and password previously created.
Step 15: Open Workspace
After signing in, click on Workspace on the top right.

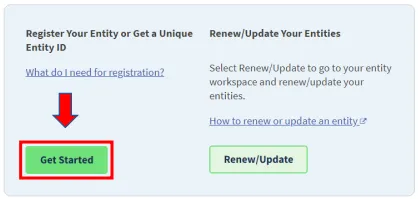
Step 16: Start the Registration Process
Scroll towards the bottom, click the green Get Started button on the left to start the process.
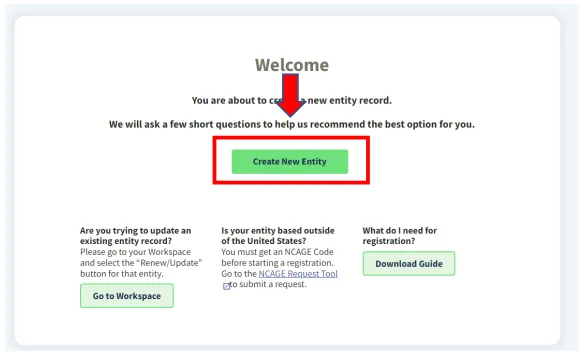
Step 17: Create New Entity
This screen should only appear the first time you go through the process. Click Create New Entity.
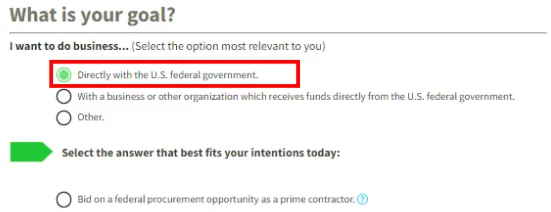
Step 18: Select Registration Purpose
This screen should only appear the first time you go through the process. Choose Directly with the U.S. federal government. A new question will open; choose Bid on a federal procurement opportunity as a prime contractor. Click Next to proceed.
Step 19: Select Federal Government
This screen should only appear the first time you go through the process. Choose Federal government.

Step 20: Select Award Type
Click Select under the All Awards column.
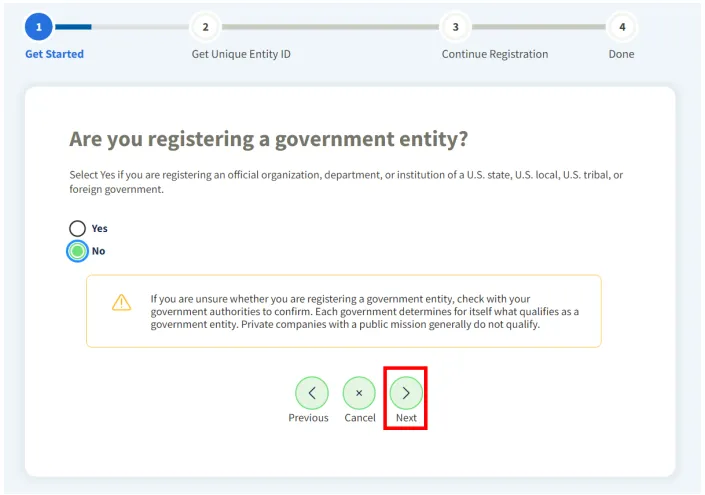
Step 21: Government Entity Question
Click No for “Are you registering a government entity?” Click Next.
Step 22: Financial Assistance Question
Click No for “Are you currently applying for or receiving federal financial assistance from the Department of Defense?” Click Next.

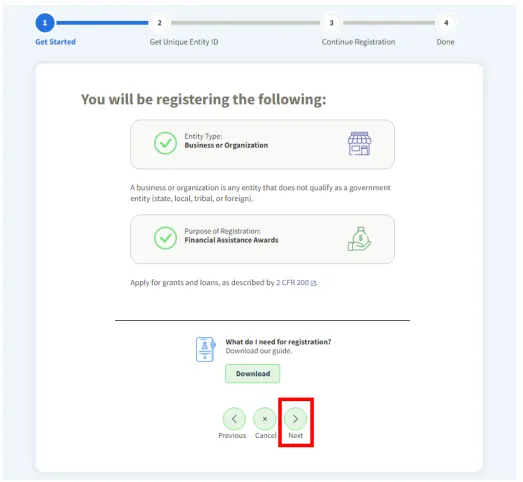
Step 23: Confirmation Page
Click Next to proceed.
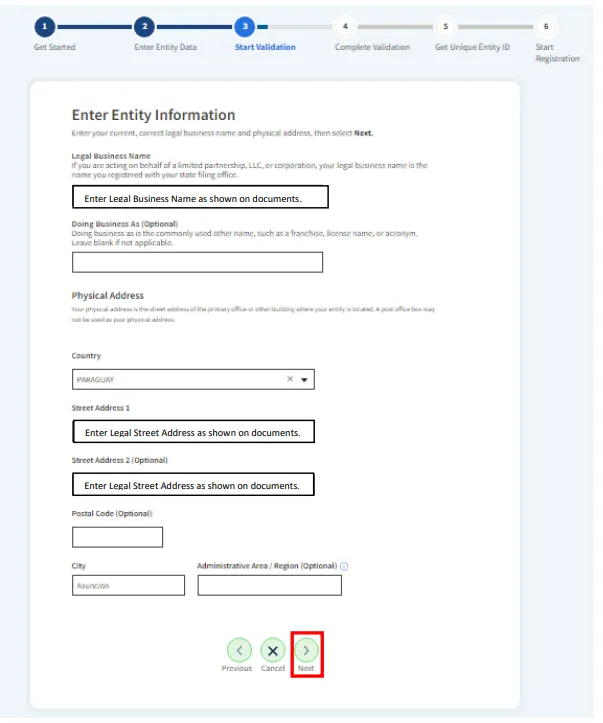
Step 24: Validate Registration
Validate that this is a unique registration by entering the legal name and primary address of your company/entity. Leave the Doing Business as (Optional) field blank. Once you have entered the exact name and address, click Next. The system will take a few seconds to load.
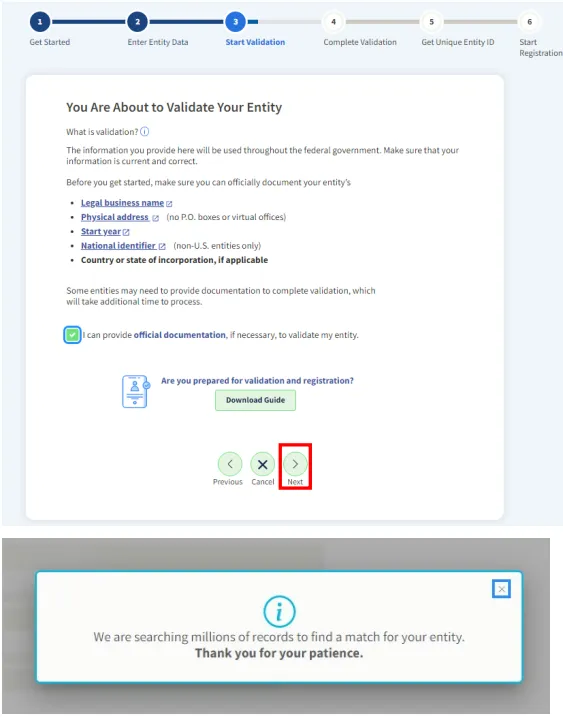
Step 25: Provide Documentation
Check the box that you can provide documentation, if needed. Click Next. You will get a message that the system is searching millions of records for a match.
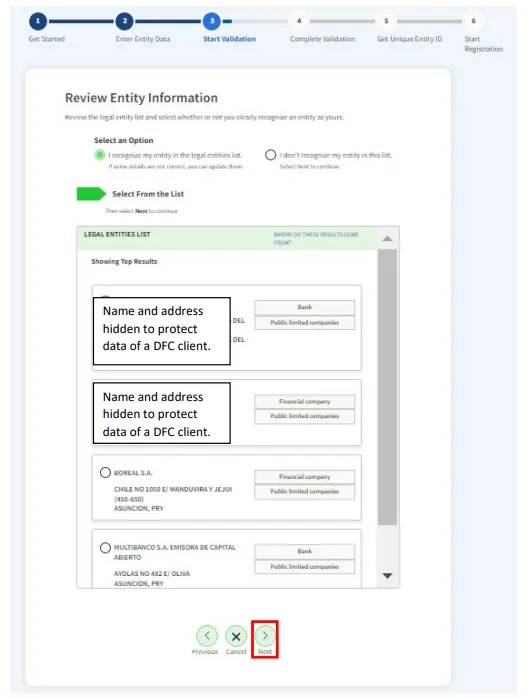
Step 26: Entity Not Found
If you do not recognize your entity in the list, click the radio button for I don’t recognize my entity in this list. Click Next to proceed.
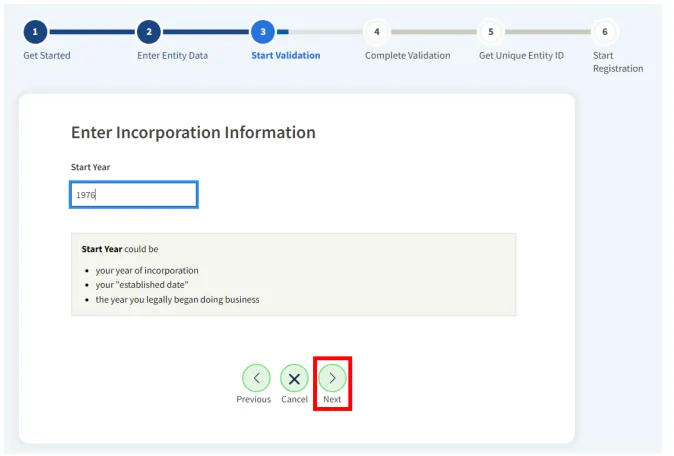
Step 27: Enter Year of Incorporation
Enter the year of Incorporation. Click Next.
Step 28: Confirm Entity Information
Confirm your Entity Information. Click Next.

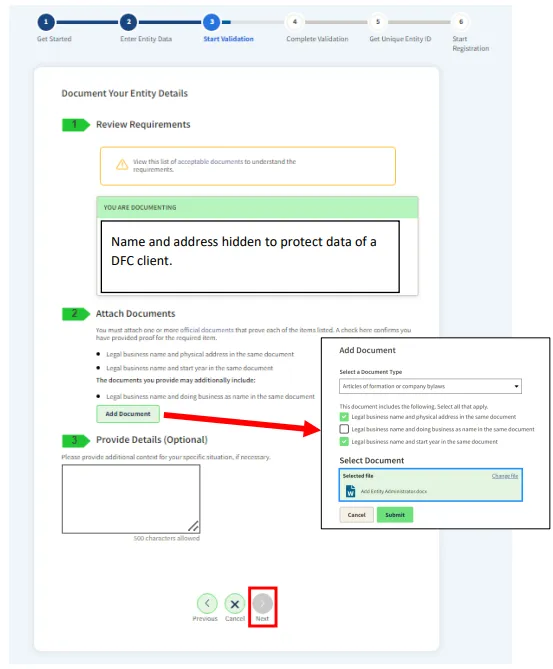
Step 29: Upload Documents
Upload the entity documents that show the same physical address you previously entered and the year of incorporation. The documents must be stamped by the appropriate filing authority and must be in English. You can upload more than one document if needed (e.g., original and translated versions). Click Next.
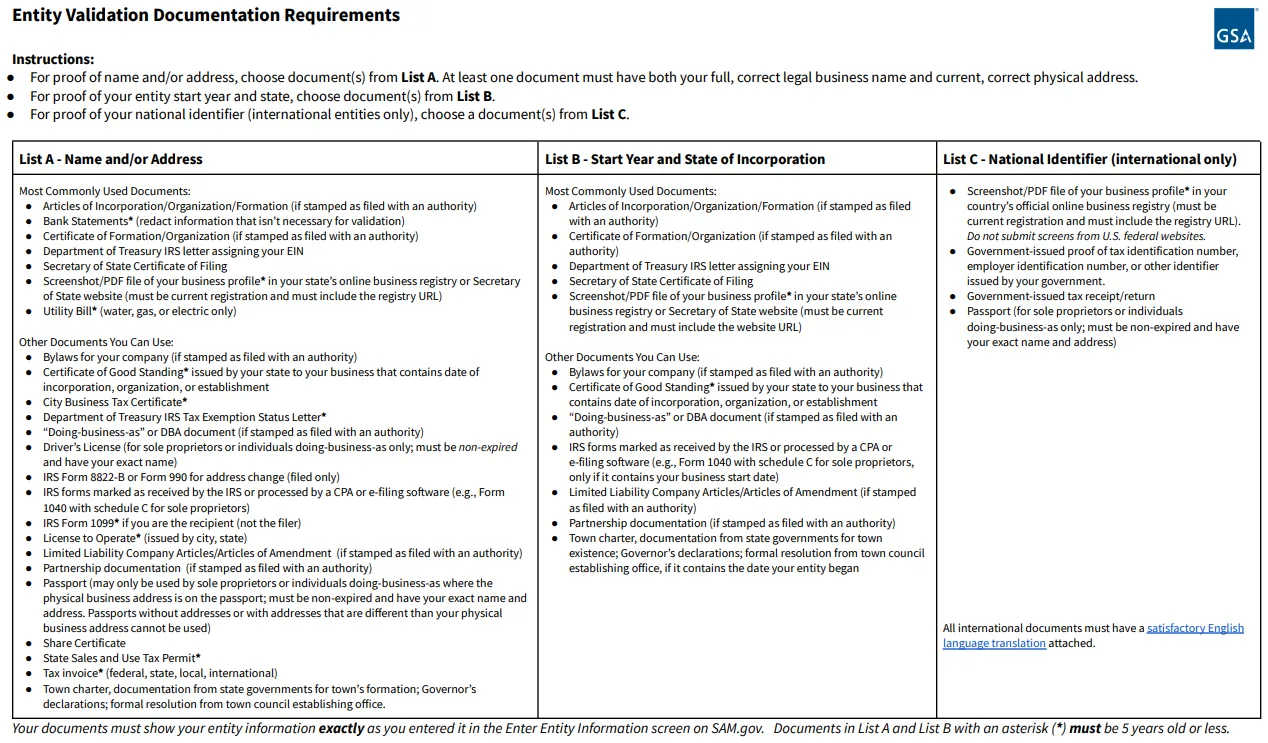
The documents must be stamped by the appropriate filing authority and must be in English. You can upload more than one document, i.e., the document in the foreign language that is stamped AND the translated document(s). You may want to provide some information if the legal business name, physical address, or incorporation date is towards the end of the document or hard to find. Click Next to proceed.
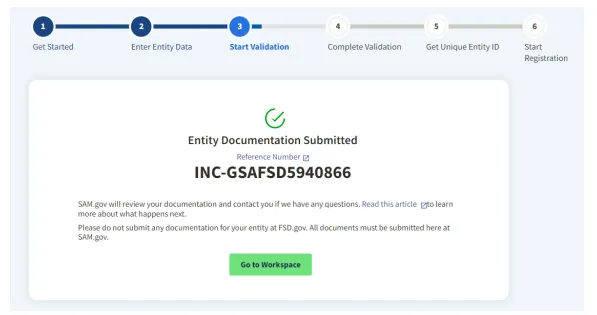
Step 30: Submit Incident to Help Desk
Once you click Next, the system will submit an incident to the help desk. A customer service representative will review the documentation. You will receive an email stating you have submitted an incident with the incident number.
Within five business days, you should receive a second email from General Services Administration Federal fsdsupport@gsa.gov. This email will either 1) let you know that they have updated the entity information to match the documents you uploaded and that you can go to SAM.gov to restart the process OR 2) that they have questions about the information. Please be sure to watch for emails from this address. If they send an email with questions, and you don’t respond within five business days, they will close the incident, and you will have to upload the documents again.
Once you receive the email(s) that the updates are complete, you will need to start the process over at Get Started.
Step 31: Await Confirmation Email
Within five business days, you should receive a second email from General Services Administration Federal (fsdsupport@gsa.gov). This email will either let you know that they have updated the entity information to match the documents you uploaded, or that they have questions about the information. If you do not respond within five business days, they will close the incident, and you will need to upload the documents again.
Step 32: Recognize Your Entity
If the system finds your entity and the address is a close or exact match, click the radio button for I recognize my entity in the legal entities list. Click the radio button in front of the entity that matches. Click Next.
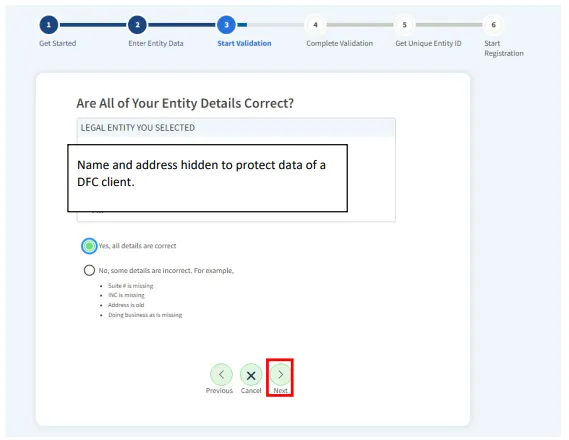
Step 33: Confirm Details
If all entity details are correct, select the radio button for Yes, all details are correct. Click Next. It is okay if the address does not match exactly but is close.
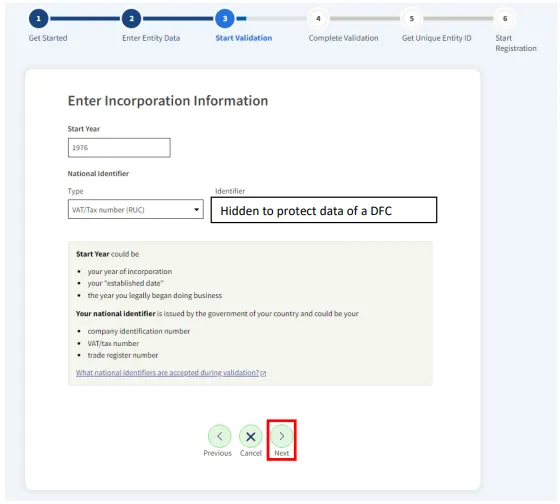
Step 34: Enter Year of Incorporation and National Identifier
Enter the year of Incorporation and the National Identifier, which could be a registration number, tax number, SWIFT Code, etc. The National Identifier varies depending on the country of incorporation of the entity. Click Next.
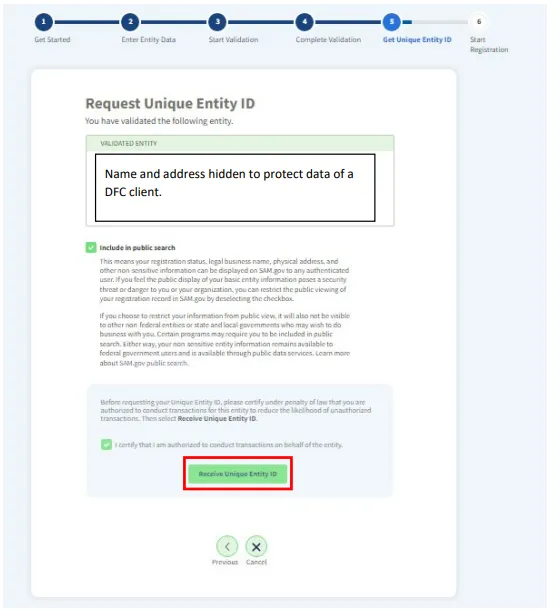
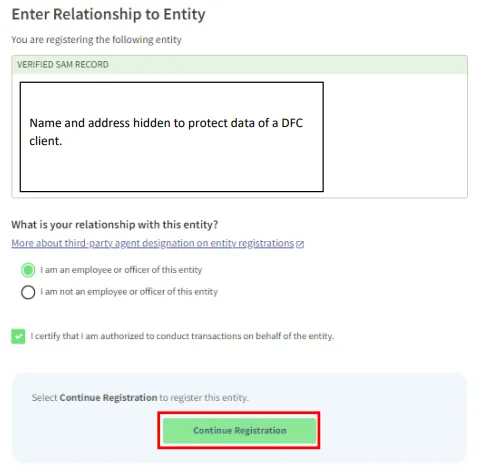
Step 35: Certify Authorization
Check the box that you certify that you are authorized to conduct business on behalf of the entity, and click Receive Unique Entity ID.
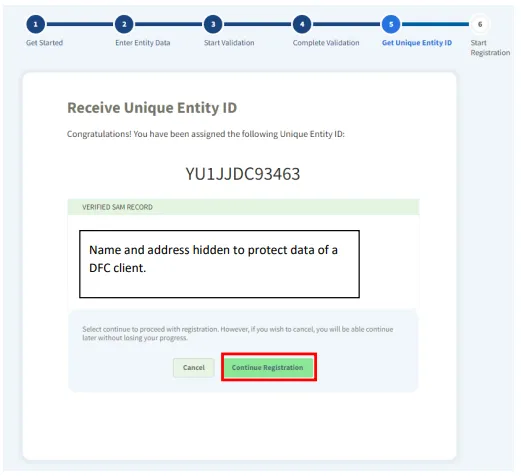
Step 36: Record Unique Entity ID
Take note of your Unique Entity ID (UEI). You will also receive an email from General Services Administration with the UEI.
SAM.gov has recently revised their roles. The entity administrator can no longer be a third-party administrator. A third-party is still able to enter all information and maintiain the registration through the data entry role, but can not be the official entity administrator and can not appoint additional entity administrators.
You will need to select if you are an employee of the entity or not. If you are an employee or officer of the entity, which is preferred, click that radio button, then check the box to certify that you are authorized to conduct transactions on behalf of the entity. Click Next to Proceed.
If you are not an employee or officer of the entity, but a third-party administrator, you will need to click that radio button. You will then need to enter the contractual agreement dates with the entity (these do not have to be exact, but can be estimated dates you have been working with the entity) and enter the point of contact at the entity (this should be the individual at the entity that will be appointed the entity administrator at the end of the process), then check the box that you certify that you are authorized to conduct transactions on behalf of the entity. Click Next to Proceed.
Step 37: Entity Administrator Role
SAM.gov has revised their roles. The entity administrator can no longer be a third-party administrator. A third-party is still able to enter all information and maintain the registration through the data entry role but cannot be the official entity administrator or appoint additional entity administrators.
- If you are an employee or officer of the entity, which is preferred, click the appropriate radio button, then check the box to certify that you are authorized to conduct transactions on behalf of the entity. Click Next.
- If you are not an employee or officer of the entity but a third-party administrator, click the appropriate radio button. Enter the contractual agreement dates with the entity (these can be estimated), and enter the point of contact at the entity (the individual at the entity who will be appointed the entity administrator). Check the box to certify that you are authorized to conduct transactions on behalf of the entity. Click Next.
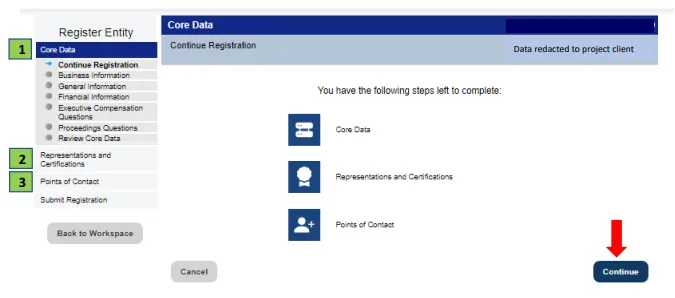
Step 38: Complete Three Sections to Register
You must complete three sections to register:
- Core Data
- Representations and Certifications
- Points of Contact
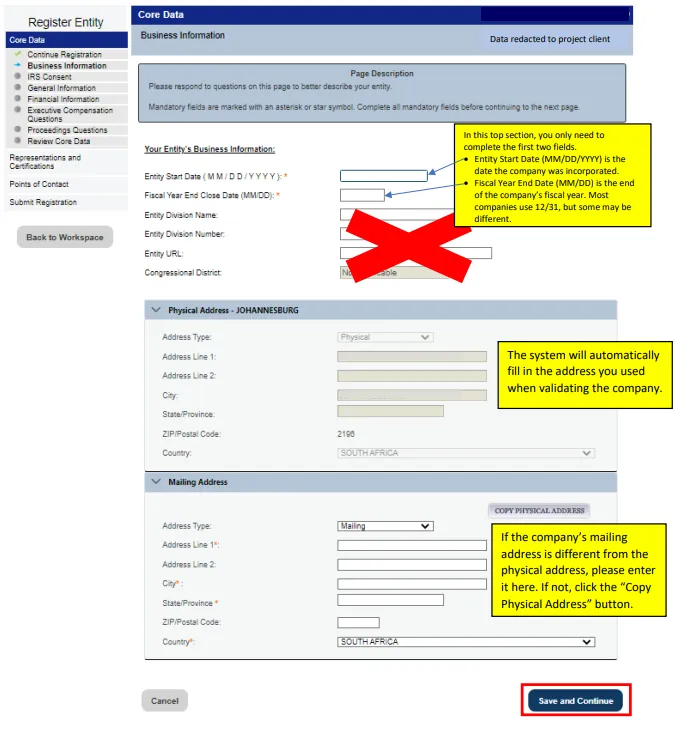
Step 39: Enter Core Data – Business Information
Click Save and Continue to proceed.
Enter Core Data - IRS Consent. This is for US-based companies only. If you’re physical address is in the United States, please complete this page. If you are an international entity, YOU DO NOT HAVE TO ENTER ANYTHING ON THIS PAGE. Click Save and Continue to proceed.
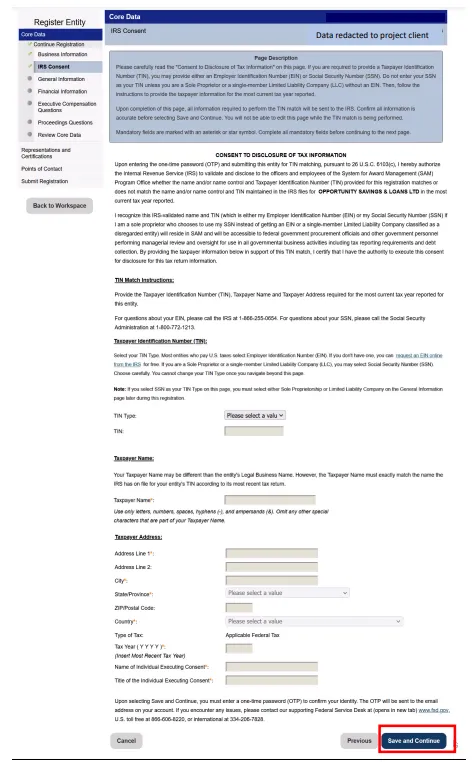
Step 40: Enter Core Data - IRS Consent
This is for U.S.-based companies only. If your physical address is in the United States, please complete this page. If you are an international entity, you do not have to enter anything on this page. Click Save and Continue to proceed.
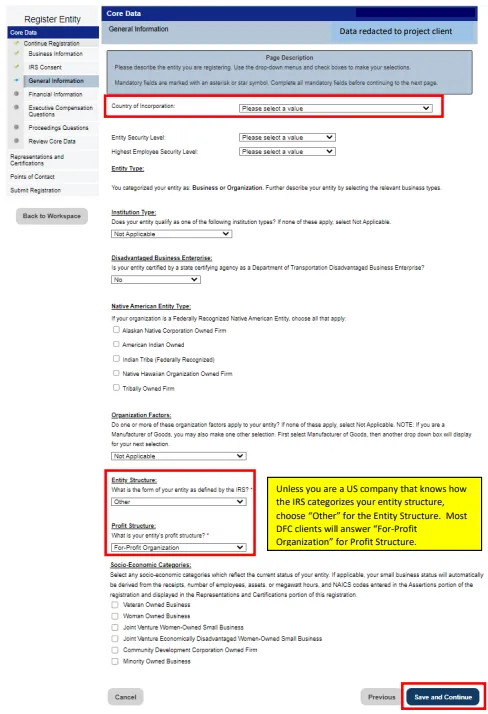
Step 41: Enter Core Data - General Information
There are only three fields that non-U.S. companies need to complete: Country of Incorporation, Entity Structure, and Profit Structure. Click Save and Continue to proceed.
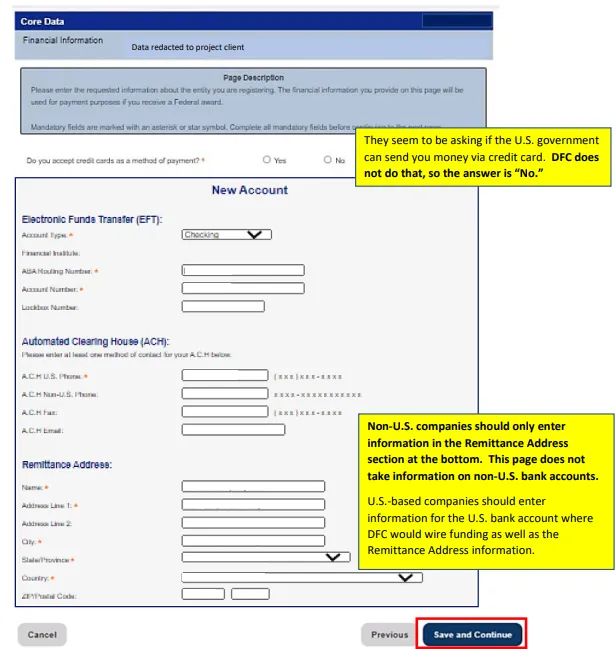
Step 42: Enter Core Data – Financial Information
Non-U.S.-based companies need to answer No for the credit card method of payment and enter the entity name and mailing address under Remittance Address. Click Save and Continue to proceed.
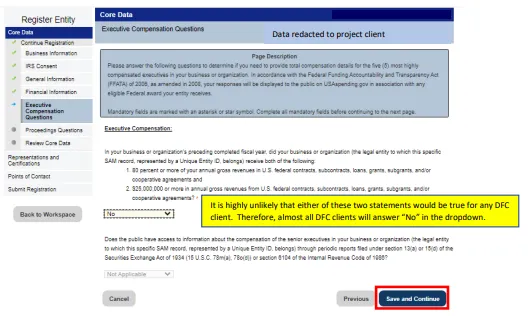
Step 43: Enter Core Data – Revenue/Executive Compensation
Select No, then click Save and Continue to proceed.
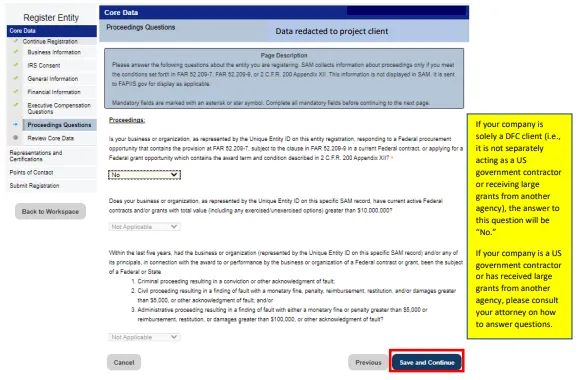
Step 44: Enter Core Data – Proceedings Questions
Select No, then Save and Continue to proceed.
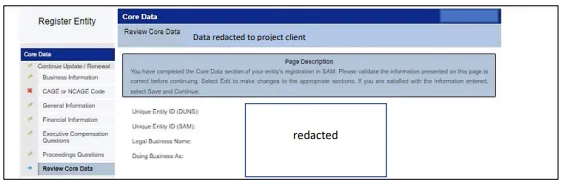
Step 45: Review Core Data
SAM.gov will now give you the opportunity to review all the information you have entered so far. If any section of the Core Data is incomplete, it will be indicated on the left (there will be a red “X” instead of a green check mark). Click Save and Continue to proceed.
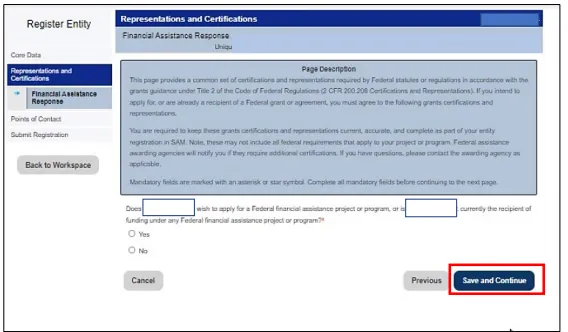
Step 46: Representations and Certifications
If you’d like to be considered for financial assistance, say Yes on this page. Click Save and Continue to proceed.
After you click “Save and Continue,” there will be an entire page of certifications and representations (see next page). Some of these certifications and representations are not applicable to you. If they are, please be assured that if you are executing contractual documentation, the requirements of that documentation will ensure that your company/entity is in compliance with these certifications and representations. Please click the certification box, then Save and Continue to proceed.
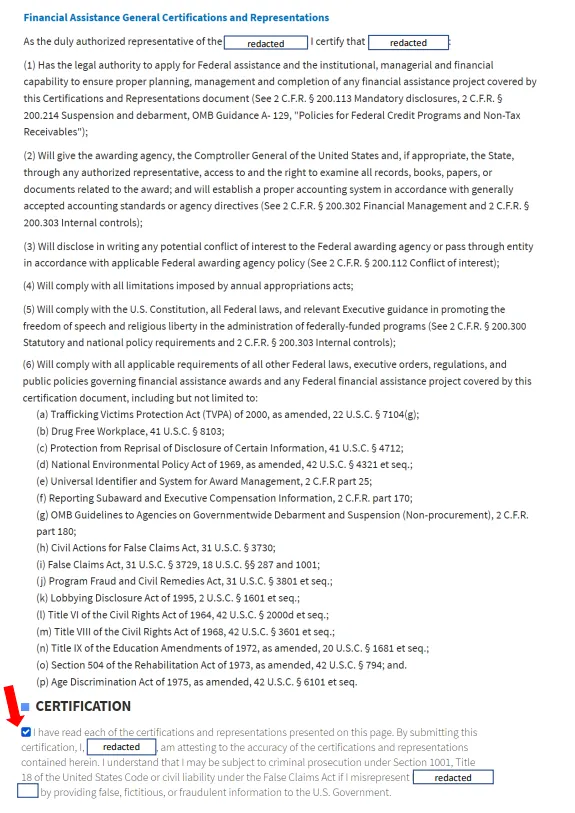
Step 47: Certifications and Representations
After clicking Save and Continue, there will be an entire page of certifications and representations. Some of these certifications and representations may not apply to you. If applicable, you are assured that contractual documentation will ensure compliance. Click the certification box, then Save and Continue to proceed.
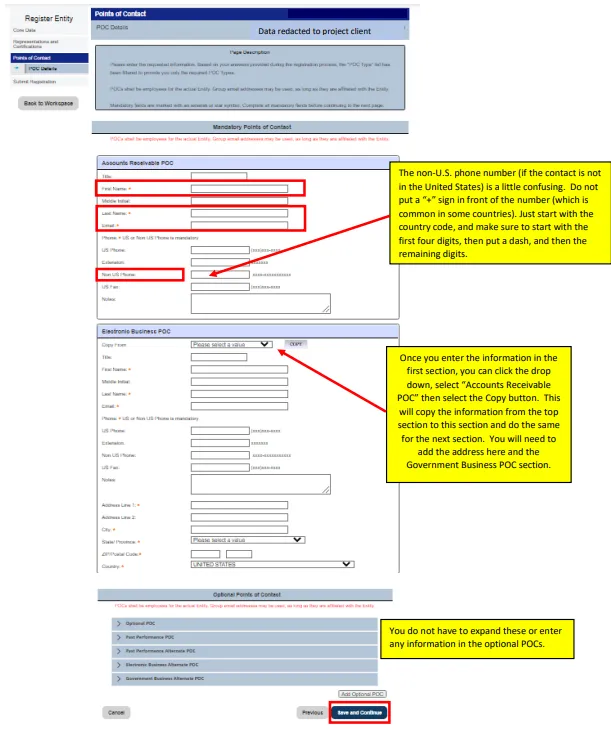
Step 48: Enter Points of Contact
SAM.gov asks that you enter contact information for Accounts Receivable POC, Electronic POC, and Government POC. Enter the First Name, Last Name, Email Address, and Non-U.S. Phone in the first section, then the same information in the second and third sections, in addition to the company address. You may enter information for the same person in each one. Click Save and Continue to proceed.
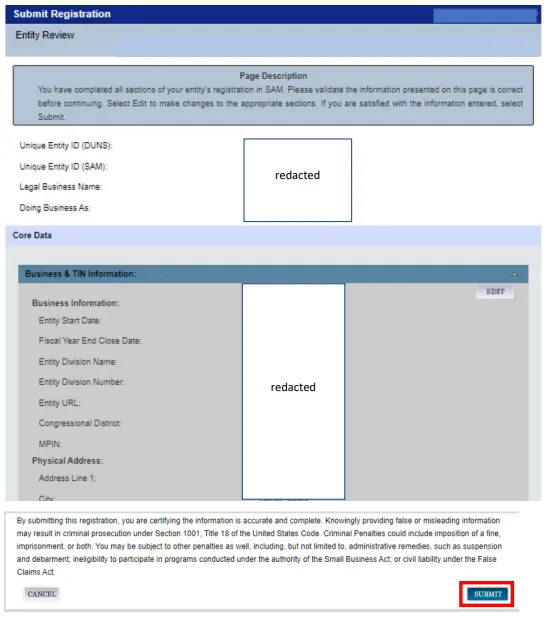
Step 49: Review and Submit
Once you have entered all required information, SAM.gov will ask you to do a final review of all data before submitting. Scroll down the page and, when finished, click the Submit button at the bottom.
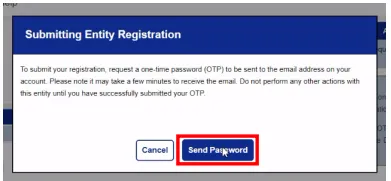
Step 50: Request One-Time Password
You need to request a one-time password to submit the registration. The password will be sent to your email. Click the Send Password button to proceed.
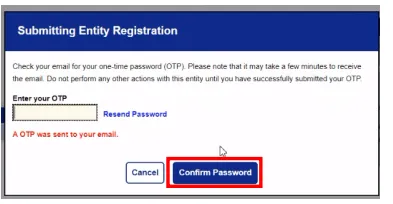
Step 51: Enter One-Time Password
Once you receive the one-time password in your email, enter it. Click Confirm Password to proceed.
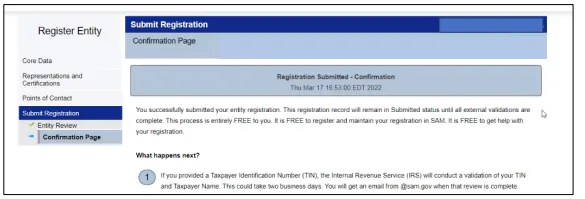
Step 52: Confirmation
If Step 28 is successful, you will see a confirmation screen and receive an email confirming that your registration has been submitted.

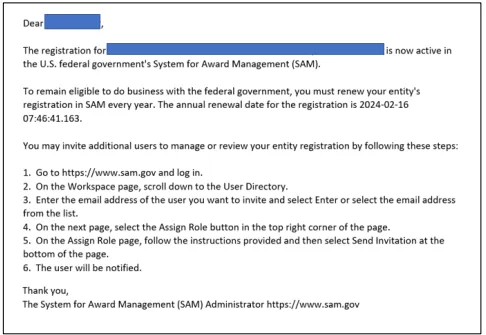
Step 53: Activation Email
In 1-5 days, you will receive an activation email.
This document provides a complete guide to registering with SAM.gov, from creating a Login.gov account to completing your entity registration. Ensure all required information is available to avoid delays.